Trick 1
Ball Invisibly Jumps Under a Cup
A small ball is apparently tipped from a cup into the magician’s hand. The ball vanishes, then reappears beneath the cup.

What You’ll Need
🥤 Paper Cup
Use an opaque cup with enough room for your thumb near the base.
⚽ Small Ball
A golf ball or ping-pong ball works well.
✂️ Scissors
Required only during preparation to cut the hidden flap.
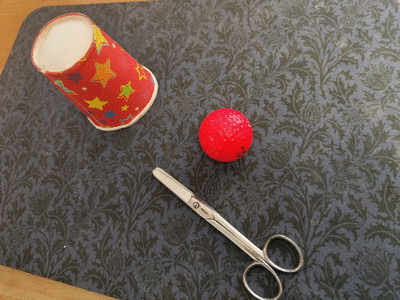
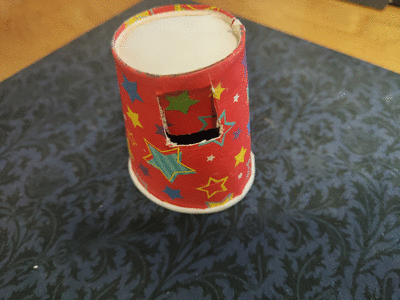
Cut the Secret Flap
Carefully cut a small three-sided flap near the bottom of the cup.
The opening should be large enough for your thumb to push inward and hold the ball against the side.
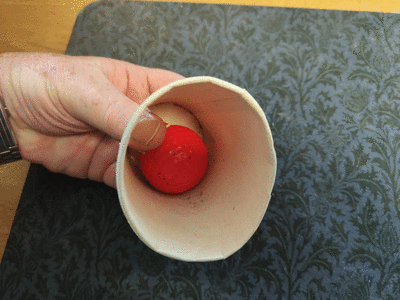
Retain the Ball
Place the ball inside the cup.
As you appear to tip it into the other hand, push your thumb through the flap and trap the ball inside the cup.
Continue the pouring action as though the ball has fallen into your hand.
Vanish and Reveal
Pretend to hold the ball in the receiving hand, then make it vanish.
Place the cup mouth-down on the table, release the ball and lift the cup.
The ball appears to have travelled invisibly underneath.
⚠️ Safety First
An adult should cut any holes or flaps in the cups. Use scissors carefully, keep sharp edges away from children and clean all props used with drinks or ice.
Trick 1 Performance Tips
Keep the flap turned toward your body.
Make the fake pour look identical to a real pour.
Do not squeeze the cup so hard that the flap becomes visible.
Trick 2
Cool as Ice: Water Turns Into Ice
An apparently empty cup is shown and water is poured inside. When the cup is turned over, only ice cubes fall out.
What You’ll Need
🥤 Opaque Cup
A paper cup works best because the inside cannot be seen.
🧽 Small Sponge
The sponge secretly absorbs the poured water.
🧊 Ice Cubes
Two or three cubes create the final transformation.
💧 Glass of Water
Use only as much water as the sponge can absorb safely.
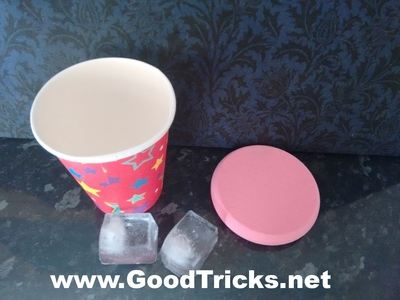
Prepare the Cup
Place the sponge at the bottom of the cup.
Put the ice cubes on top before inviting the audience to watch.
Keep the cup upright so no one can see inside.

Pour in the Water
Explain that you will attempt to freeze the water instantly.
Slowly pour a small amount into the cup.
The hidden sponge absorbs it.
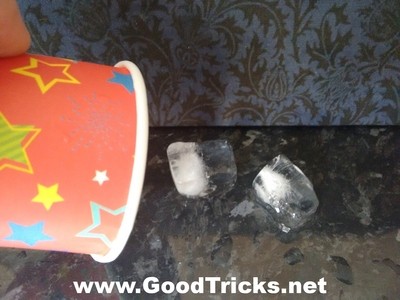
Reveal the Ice
Turn the cup over above a table or bowl.
The ice cubes fall out while the absorbed water remains inside.
Dispose of the paper cup naturally before anyone looks inside.
Trick 2 Performance Tips
Test the sponge capacity before performing.
Do not pour more water than it can absorb.
Keep the cup tilted away from spectators so the hidden contents remain unseen.
Trick 3
Floating Paper Cup
The magician holds an empty cup between both hands, slowly releases the fingers and makes the cup appear to float in mid-air.

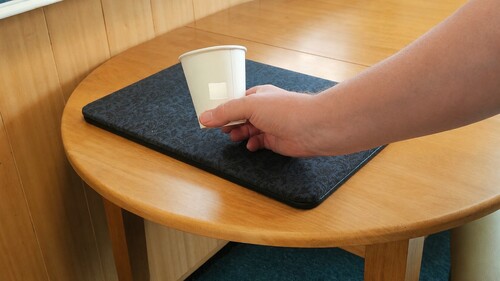
Make the Thumb Hole
Carefully create a hole in the side of a large paper or foam cup.
The hole should be just large enough for your thumb.
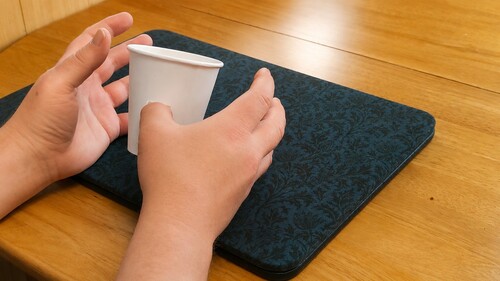
Conceal the Support
Insert the thumb through the side nearest your body.
Hold the cup between both hands so the audience cannot see the hole.

Create the Levitation
Slowly open both hands while the hidden thumb continues supporting the cup.
Move the hands slightly forward as though following the floating object.
Finish by grasping the cup again and discreetly removing the thumb.
Trick 3 Angle Advice
Keep spectators directly in front of you.
Avoid anyone standing behind or far to the side.
Practise in a mirror until the thumb and hole remain completely hidden.
Why Paper Cups Work Well for Magic
Paper cups are cheap, familiar and easy to prepare.
Because spectators see them as ordinary disposable objects, they rarely suspect hidden flaps, sponges or finger holes.
The three tricks below use different principles: retention, absorption and concealed support.
Common Mistakes
Do not expose prepared flaps or holes before the trick begins.
Avoid using transparent cups.
Test every prepared prop before performing.
Keep movements relaxed so the cup does not look suspicious.
Dispose of gimmicked cups naturally after the effect.
Practice Plan
Practise each trick separately before combining them into a routine.
Rehearse the cup orientation so the prepared side always faces away.
Record each effect from the audience’s viewpoint.
Finish with the floating cup because it provides the most visual climax.