The Effect
A finger ring is borrowed and threaded onto a long piece of rubber band.
The band is held between both hands.
The ring slides downward normally at first.
The performer then claims they can make it fall upward, and the ring slowly climbs along the rubber band.

What You’ll Need
🟡 Rubber Band
Use a thin, flexible band rather than a thick or brittle one.
💍 Finger Ring
A smooth borrowed ring makes the effect feel spontaneous.
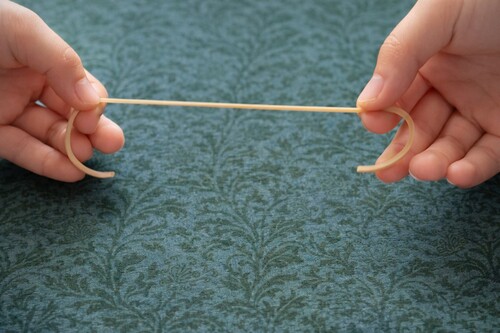
Break the Rubber Band
Break or cut the band so it becomes one long elastic strand.
Make sure the ends are clean and safe to handle.
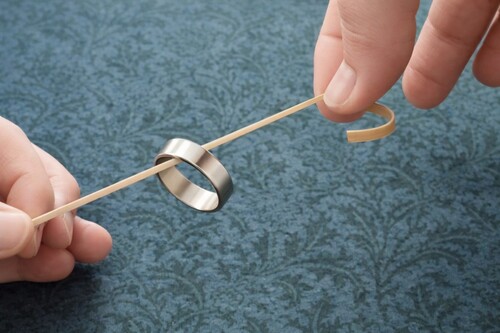
Thread on the Ring
Borrow a ring and thread it onto the rubber band.
Hold one end in each hand with the band stretched to about twelve inches.
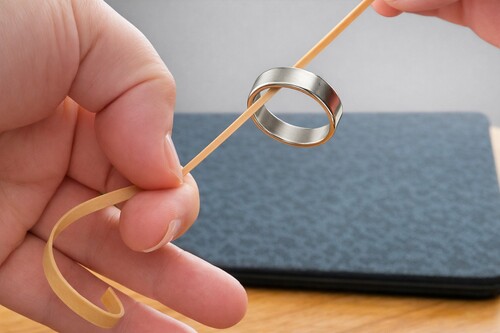
Hide the Extra Length
Keep most of the unused rubber band concealed in the left hand.
The backs of your hands should face the audience so the loose section remains hidden in the palm.
Hold both hands at roughly the same height.
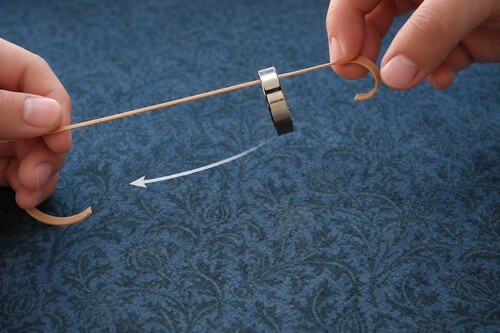
Prove the Ring Falls Normally
Position the ring about an inch from the right fingertips.
Raise the right hand slightly and let the ring slide toward the left.
Say, “Anyone can make the ring fall down.”

Make the Ring Climb
Hold the visible section of band steady.
Very slowly relax the grip of the left fingers, allowing the hidden extra length to slide outward.
As the band shortens on the visible side, the ring appears to move uphill toward the right hand.
⚠️ Protect the Borrowed Ring
Use a smooth rubber band with no sharp breaks. Handle borrowed jewellery carefully and avoid valuable or fragile rings until the movement is reliable.
Why the Trick Works
The ring is not actually climbing against gravity.
The hidden rubber band is being released from the left hand.
Because the audience sees only the stretched visible section, they interpret the shortening band as upward movement by the ring.
🎯 Skills Used
Best Hand Position
Keep the hands level so the visible band looks horizontal.
Turn the backs of the hands toward the audience.
The left hand should conceal the loose band naturally without looking clenched.
Keep the ring slightly away from the fingertips so its movement is clear.
Presentation Tips
First let the ring fall normally to establish the direction of gravity.
Pause before saying, “But I can make it fall up.”
Release the hidden band slowly and evenly.
Keep your eyes on the ring so the audience follows it.
🎩 Magic Tip
A slow climb looks more magical than a fast one. The ring should seem to glide rather than shoot along the band.
Common Mistakes
Do not expose the loose band in the left hand.
Avoid releasing the hidden length too quickly.
Keep the visible band under gentle tension.
Do not let the ring touch the fingertips before the climb begins.
Avoid thick rubber bands that create jerky movement.
Practice Plan
Practise concealing the extra band while keeping the left hand relaxed.
Rehearse releasing the hidden length at a steady speed.
Test several rubber bands to find one that gives smooth movement.
Record the trick from the audience’s viewpoint before using a borrowed ring.